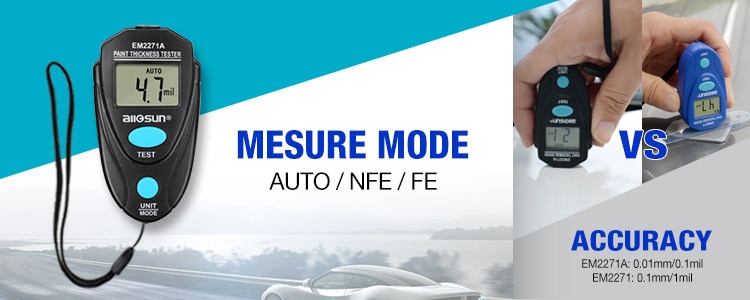
(refrigerator,oven,microwave oven,etc) 5.For measurements in AUTO test mode and on object with steel substrate ±(10% of reading + 0.10mm), most car is made of steel, and, if you get result of 0.00mm or 0.01mm , it is under normal condition,acceptable error, because most car paint thickness is 0.1-0.15mm. 6. There is not calibration plates in the parcel of EM2271. It doesn't need calibration. If you need, please contact us. 7 . Please press the probe vertical to the object, and make sure the object surface is smooth and clean. EM2271 Specifications: • Measurement range: 0.0 to 2.0 mm, 0 mil to 80 mil • Accuracy: 2%rdg +-0.1 mm, or 2%rdg+-4 mil • Resolution:0.1 mm/1 mil • Power supply: 1 x 3 V button cell, CR2032 or equivalent, • Measuring technology: Magnetic • Size :6.9 x 3.8 x 2 cm • Weight: About 23 grams (including button cell) How the device work 1. Probe Before measurement, place the tester with its probe firmly against target surface. 2. Display 3. "TEST" button (1). Press "TEST" button to turn on the tester. Press and hold down this button for about 1 second to turn off the tester. (2). Press "TEST" button to delete the reading on the display,the display will show "- -". 4. "UNIT" button Press this "UNIT" button to select desired unit: mm or mil     |
EM2271A
The upgrated EM2271.
It can measure the Fe & NFe.
Accuracy improved 10, measurement range extended,
resolution higher, better cost-efficiency.
For measurements in AUTO test mode and on object with steel substrate
±(10% of reading + 0.10mm),
most car is made of steel, and, if you get result of 0.00mm or 0.01mm , it is under normal
condition,accpetable error, because most car paint thickness is 0.1-0.15mm.
